Purrist User Manual
Overview
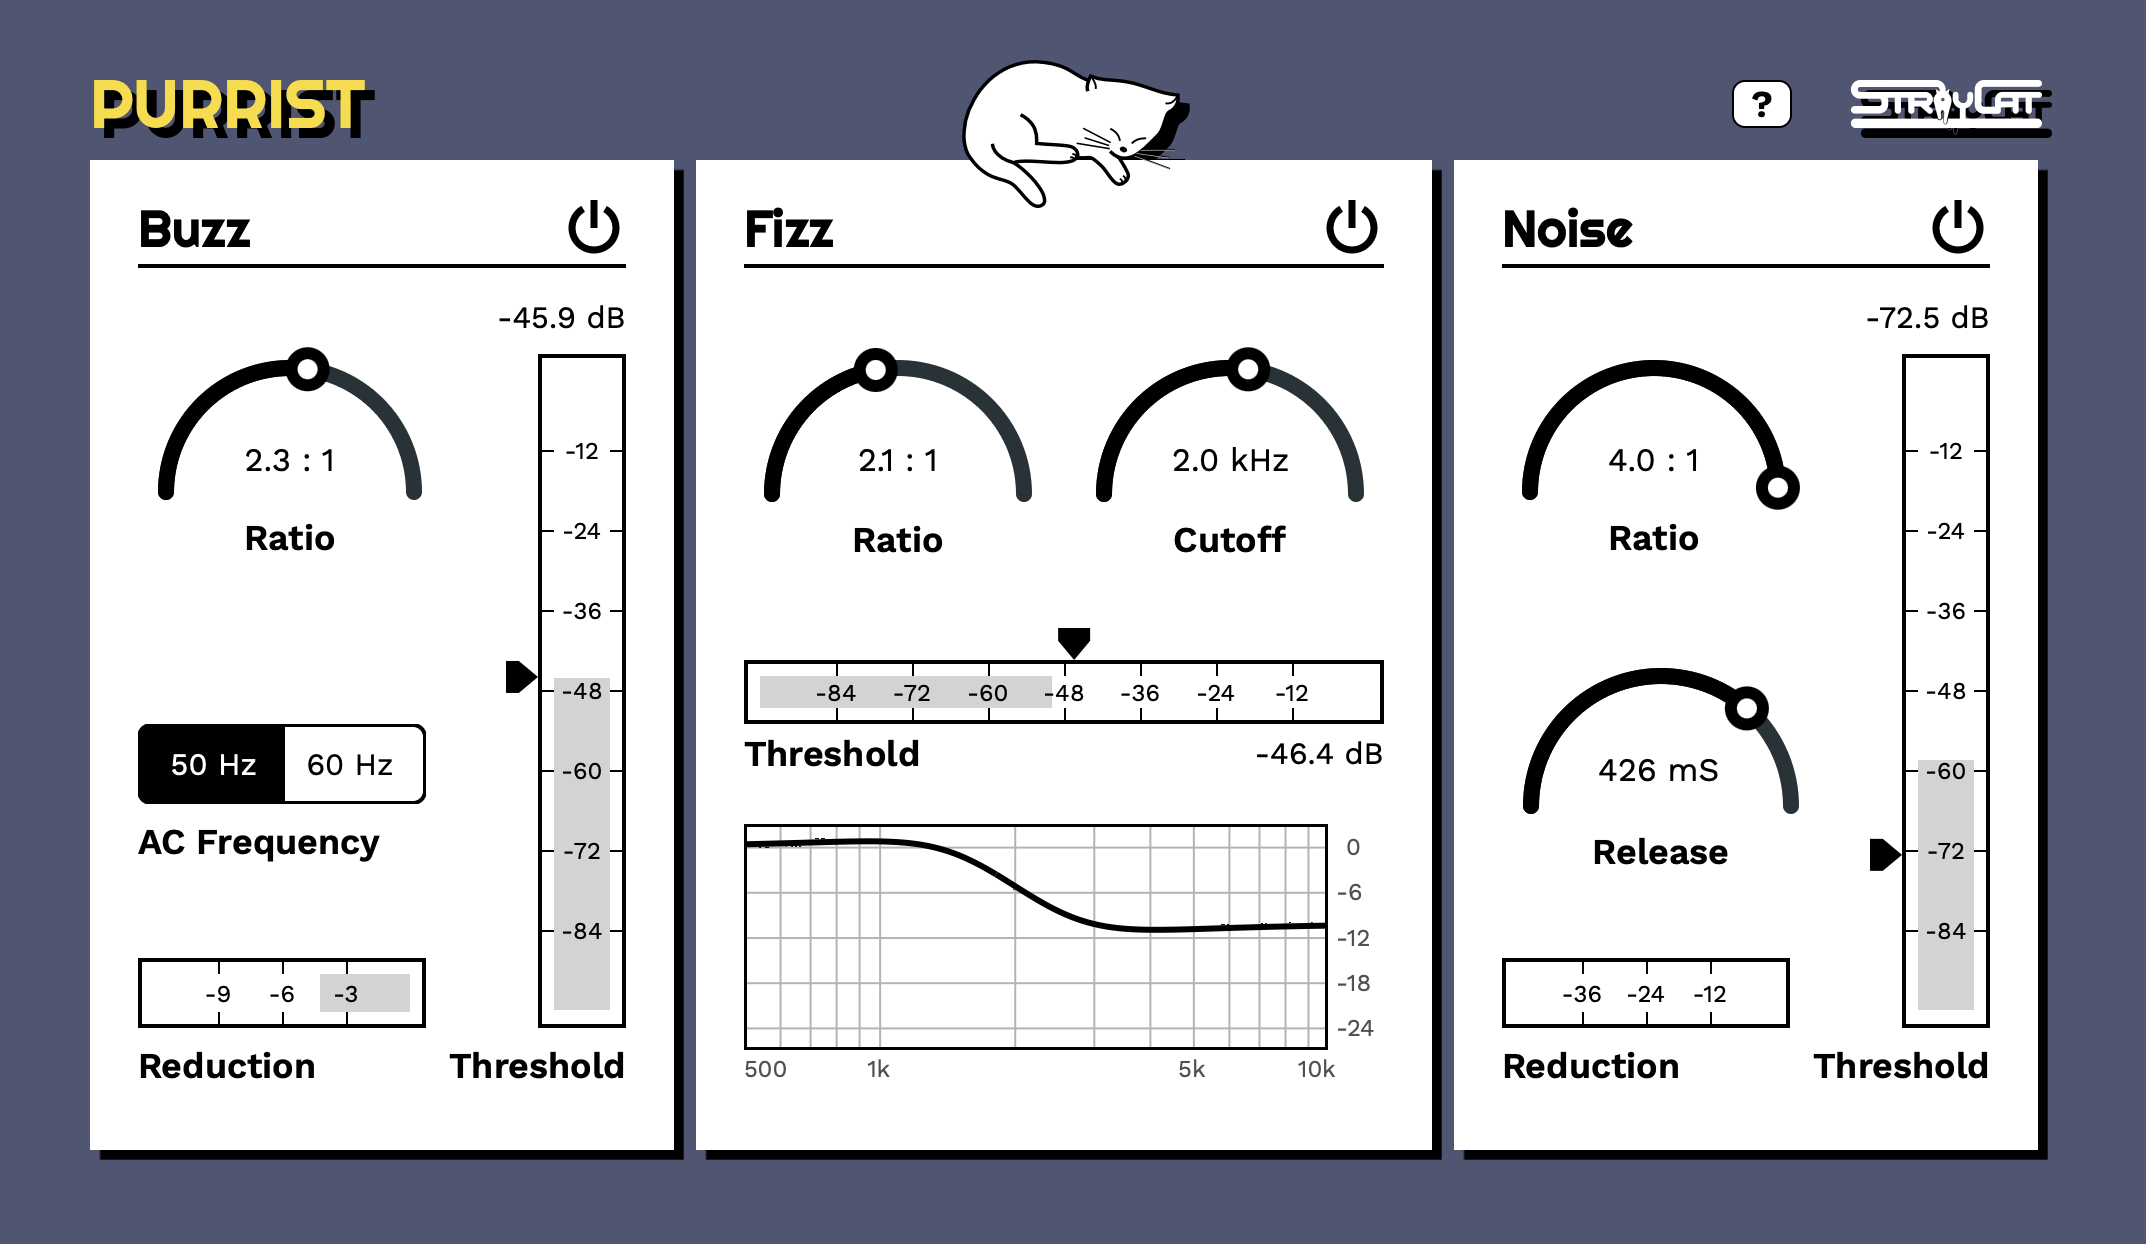
Purrist is a state-of-the-art noise suppressor designed primarily for use with electric guitars. What distinguishes it from other plugins and hardware gates is its ability to preserve your guitar sustain in the process. The three sections of the plugin target the AC hum, white noise and other interference.
Signal chain
The audio signal is processed from left to right. First it goes through the Buzz section, then Fizz, then Noise. It's highly recommended to tweak the settings in that exact order. While you work on "Buzz", turn the "Fizz" and "Noise" off so it's easier to hear the results of your actions. Then enable "Fizz" to set it up (with "Buzz" still on), then do the same with "Noise" (with both previous sections on).
If you decide to turn the section on or off (or to make substantial changes of its settings) later, the behavior of all following sections may be affected. You may need to readjust them (especailly the threshold levels). Minor tweaks should be fine at any point.
Buzz
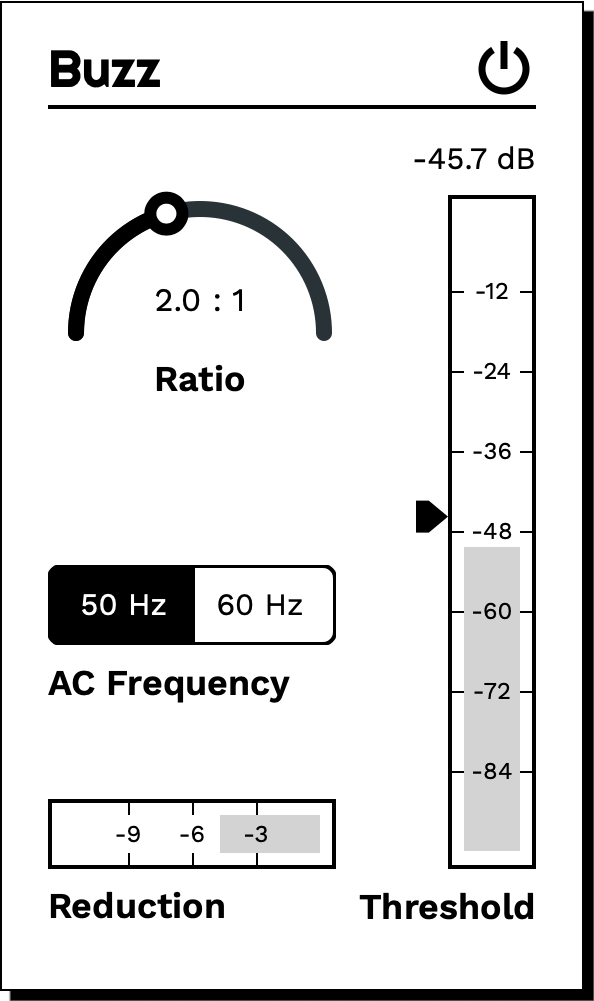
This is where you can suppress the AC buzz (also known as hum) induced by electrical installation. It comes especially handy when your guitar is equipped with single-coil pickups.
Threshold
The buzz will only be removed when the signal is below the threshold. The gray bar displays the input signal RMS level in real-time.
Ratio
Defines the noise attenuation depth. For example, if the signal is 3 dB below the threshold, attenuation will be equal to 3 dB * (Ratio - 1). A 2:1 ratio will result in 3 dB of noise attenuation, a 3:1 ratio will result in 6 dB of attenuation, and so on.
AC Frequency
You have to choose the AC frequency based on the electricity standard of the country you're in.
Reduction
The "Reduction" indicator displays the attenuation level in real-time. The meter range stops at -13 dB, but the actual reduction limit is -15 dB.
Recommended flow
- Turn the "Fizz" and "Noise" sections off
- Set the correct AC frequency for your country.
- Play a note (or a chord) on your guitar. Observe the input level on the threshold bar while the sound decays. Take note of the level at which the AC buzz becomes apparent. Set the threshold slightly above this level.
- Set the ratio so the reduction meter oscillates from -12 to -10 dB when you are not playing anything. Buzz reduction does affect your guitar sound slightly (when below the threshold) so you shouldn't go radical here. Use the lowest satisfactory value.
- If there is still a significant amount of buzz around the threshold level, try increasing the threshold.
- If there is an audible "ringing" artifact around the threshold level, try reducing the ratio.
Fizz
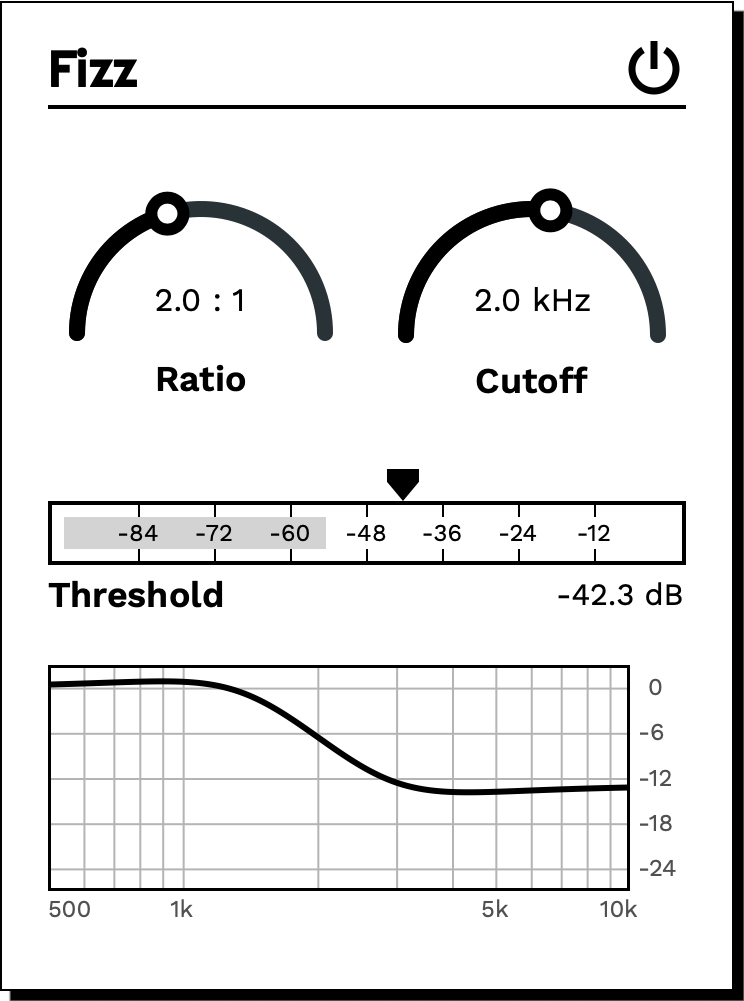
The "Fizz" section will handle any high-frequency interference, such as white noise. If some higher AC buzz harmonics manage to pass the "Buzz" section, this is where it ends for them as well. It is basically a dynamic shelving filter that attenuates high frequencies when the decaying string sound loses its treble content anyway.
Ratio
Defines the high frequency attenuation depth. For example, if the signal is 3 dB below the threshold, attenuation will be equal to 3 dB * (Ratio - 1). A 2:1 ratio will result in 3 dB of noise attenuation, a 3:1 ratio will result in 6 dB of attenuation, and so on.
Cutoff
All the frequencies above the cutoff will be attenuated when the signal is below the threshold level
Threshold
Attenuation will happen only when the signal is below the threshold. The gray bar displays the input RMS level in real-time.
Reduction
The reduction graph displays the high frequency attenuation level in real-time. The reduction is limited to 24 dB
Recommended flow
- If you intend to use the "Buzz" section, make sure to set it up first.
- Turn the "Noise" section off
- Play a note (or a chord) on your guitar. Observe the input level on the threshold bar while the sound decays. Take note of the level at which the noise becomes apparent. Set the threshold slightly above this level.
- Start with a low ratio and increase it if necessary.
- If there is still a significant amount of noise around the threshold level, try increasing the threshold.
- Although the default 2 kHz cutoff should be optimal for most electric guitars, you should use your ears to decide if that's the case. If the decaying string sound of your guitar still contains a lot of treble, you should probably increase it. If you play a bass guitar then the lower value should work better.
Noise
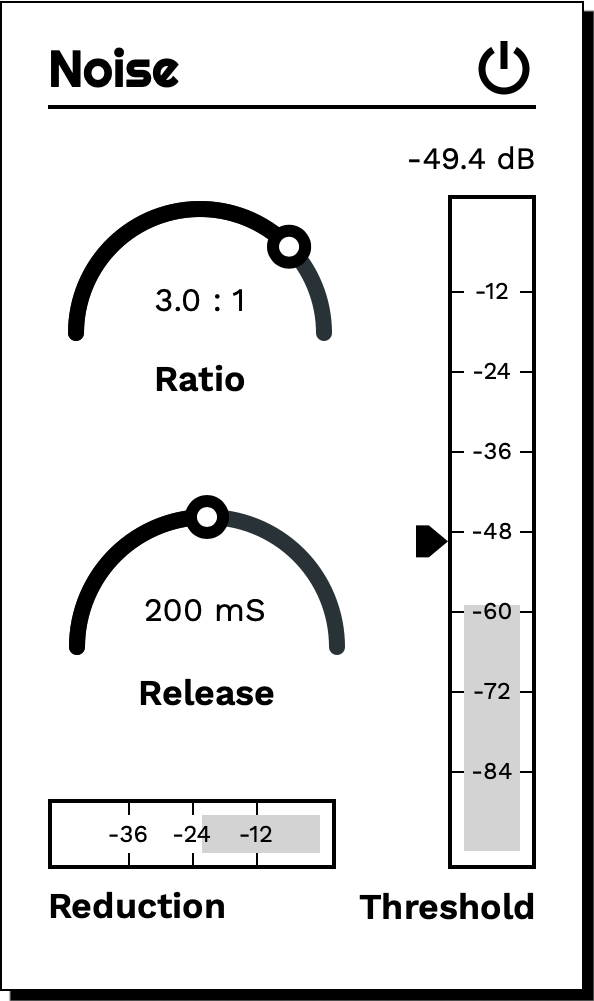
The last stage is a classic expander-type noise gate. Instead of shutting the sound off completely when the level is below the threshold, the volume is attenuated gradually. The lower the volume, the more attenuation will be applied. The result is a much more natural transition.
Threshold
The noise will only be removed when the signal is below the threshold. The gray bar displays the input signal RMS level in real-time.
Ratio
Defines the noise attenuation depth. For example, if the signal is 3 dB below the threshold, attenuation will be equal to 3 dB * (Ratio - 1). A 2:1 ratio will result in 3 dB of noise attenuation, a 3:1 ratio will result in 6 dB of attenuation, and so on.
Release
This parameter allows for smoothing out the attenuation in case of sudden volume drop. The longer the release time, the longer it takes to update the attenuation value if it's lower than the previous one.
Reduction
The "Reduction" indicator displays the attenuation level in real-time. The meter range stops at -48 dB, but there is no actual limit to the reduction.
Recommended flow
- If you intend to use the "Buzz" and/or "Fizz" section, make sure to set them up first.
- Observe the input level on the threshold bar with strings muted. Set the threshold slightly above this level
- Set the ratio to achieve the desired attenuation/smoothness balance. Setting the highest possible ratio (and thus the maximum attenuation) might be tempting, but note that this will cause the sound to cut off abruptly when crossing the threshold. It might be worth it to take a moment and find the sweet spot instead.
- You can increase the release time to make the transition even smoother at the cost of passing some noise through during this time. It's your call.
Support
In case of any questions, issues, or feedback, please contact us at: support@straycataudio.com
Privacy Policy
You can find the Purrist Privacy Policy here